Exposure is the amount of time the camera spends acquiring a video frame. Increasing the exposure allows more light to reach the sensor (brightening the image), while lowering it reduces the light (darkening the image).
Other factors that affect brightness include:
- Aperture setting on the lens (marked "Open-Close") – turn to "Open" to brighten
- Gain setting of the camera
- Lighting conditions
If your image is too dark, first try opening the aperture. For more details, see: My image is too dark using a Basler camera.
Solution
- Close your Noldus software (e.g., MediaRecorder or EthoVision XT).
- Start the Basler Pylon Viewer software.
- Note: Pylon Viewer is installed with the camera driver. If it's not on your desktop, check the Start menu under Basler.
- Go to Tools > Options and ensure the User Level is set to Expert or Guru.

- In the Devices panel, double-click the Basler camera under GigE or USB.
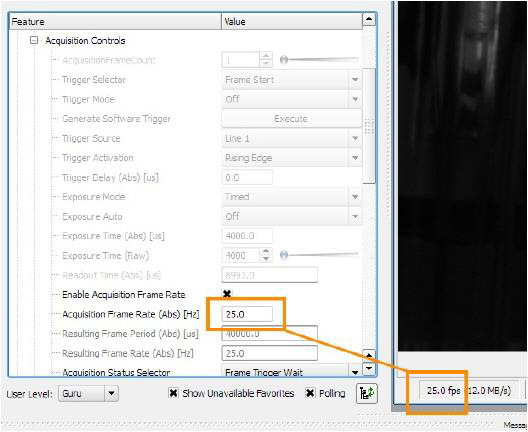
- In the Features panel, open the Basler camera item and double-click Acquisition Controls.
- Note: If you don’t see the Features panel, go to Window > Features to enable it.
- Set Exposure Mode to Timed.
- Set Exposure Auto to Off.
- Enter your value in Exposure Time (Abs) [us] and press Tab to confirm.
- Note: Higher exposure = brighter image; too high = dropped frames; too low = flicker.
Typical exposure ranges:
- Non-DanioVision: 8,000 to 25,000 μs
- With IR lighting: ~30,000 μs (reduce frame rate if needed)
- DanioVision: 4,000 μs (1280x960) or 2,000 μs (640x480)
- Click Continuous Shot to preview the frame rate.
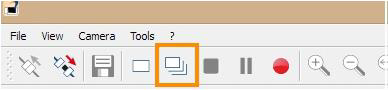
- At the bottom of the preview window, verify the actual frame rate matches Acquisition Frame Rate (Abs) [Hz] (recommended: 25 or 30 Hz).
- If frame rate is too low, try the following:
- a. Lower exposure time and increase Gain (Raw) under Analog Control

- b. Open the lens diaphragm (aperture)
- c. Lower video resolution in AOI Controls by adjusting Width and Height
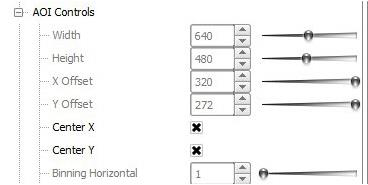
- Note: Lowering resolution crops the image and may shift the center. Ensure Center X and Center Y are checked.
- d. Lower the frame rate. Match this in EthoVision to avoid Missed or Interpolated Samples.
- Stop Continuous Shot.

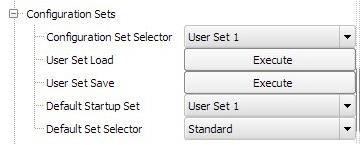
Then save the configuration:
- Select User Set 1 from Configuration Set Selector
- Click Execute next to User Set Save
- Set User Set 1 as the Default Startup Set
- Close Pylon Viewer
- Note: These saved settings will automatically load each time you start your Noldus software.
Tip: You can also save different settings in User Set 2 and User Set 3, and choose your preferred default under User Set Default.